Step-by-Step Guide: From Concept Board to Dream Room
Step-by-Step Guide: From Concept Board to Dream Room
Designing your dream room can feel overwhelming—Pinterest boards are full, your online shopping cart is overflowing, and you’re still not sure how it will all look together in real life.
That’s where a
concept board comes in. It’s not just a pretty collage—it’s the bridge between your vision and a fully finished, functional room.
At Mulberry Lane Interiors LLC, we’ve perfected the process of turning a concept board into a reality you can live in, love, and show off. In this guide, we’ll walk you through exactly how we take your ideas from inspiration to installation—step by step.
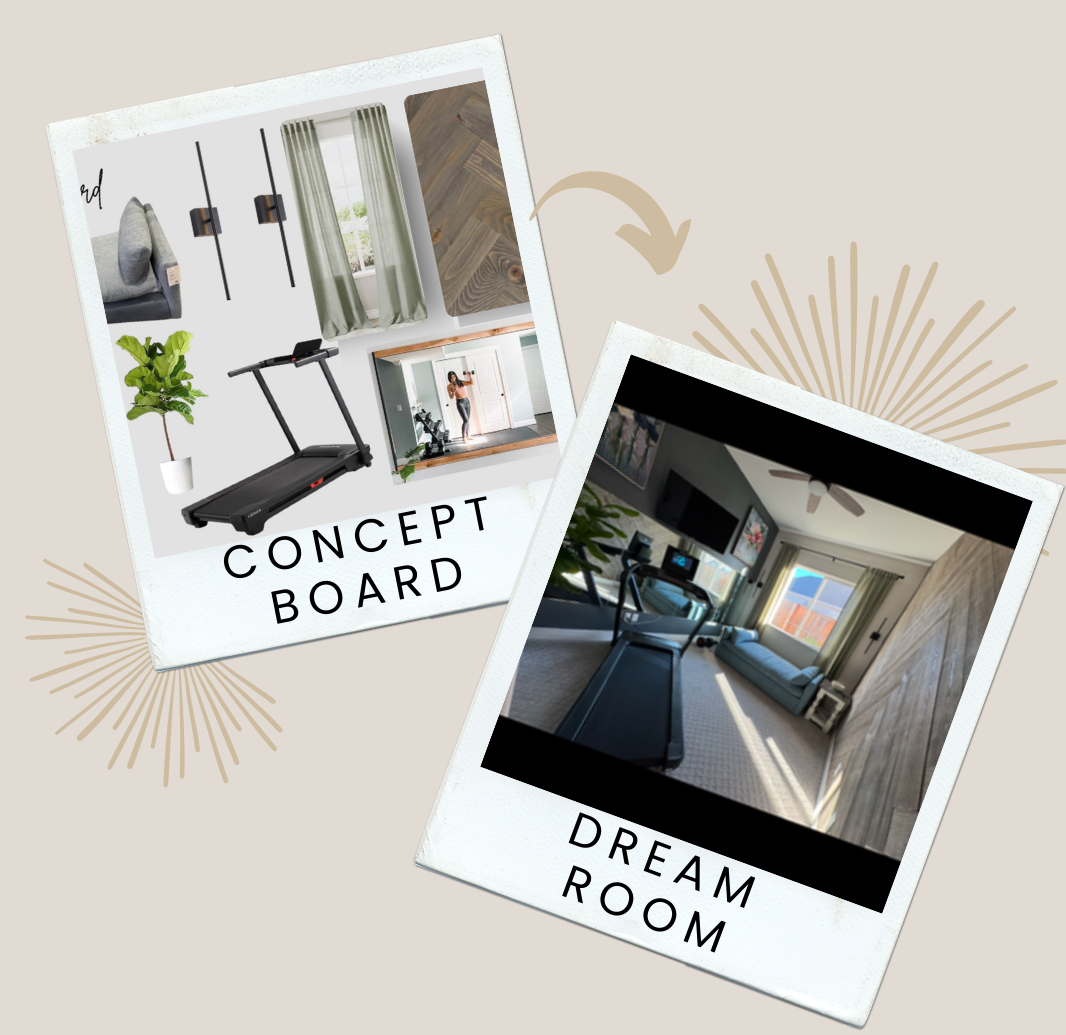
What Is a Concept Board (and Why Is It Essential)?
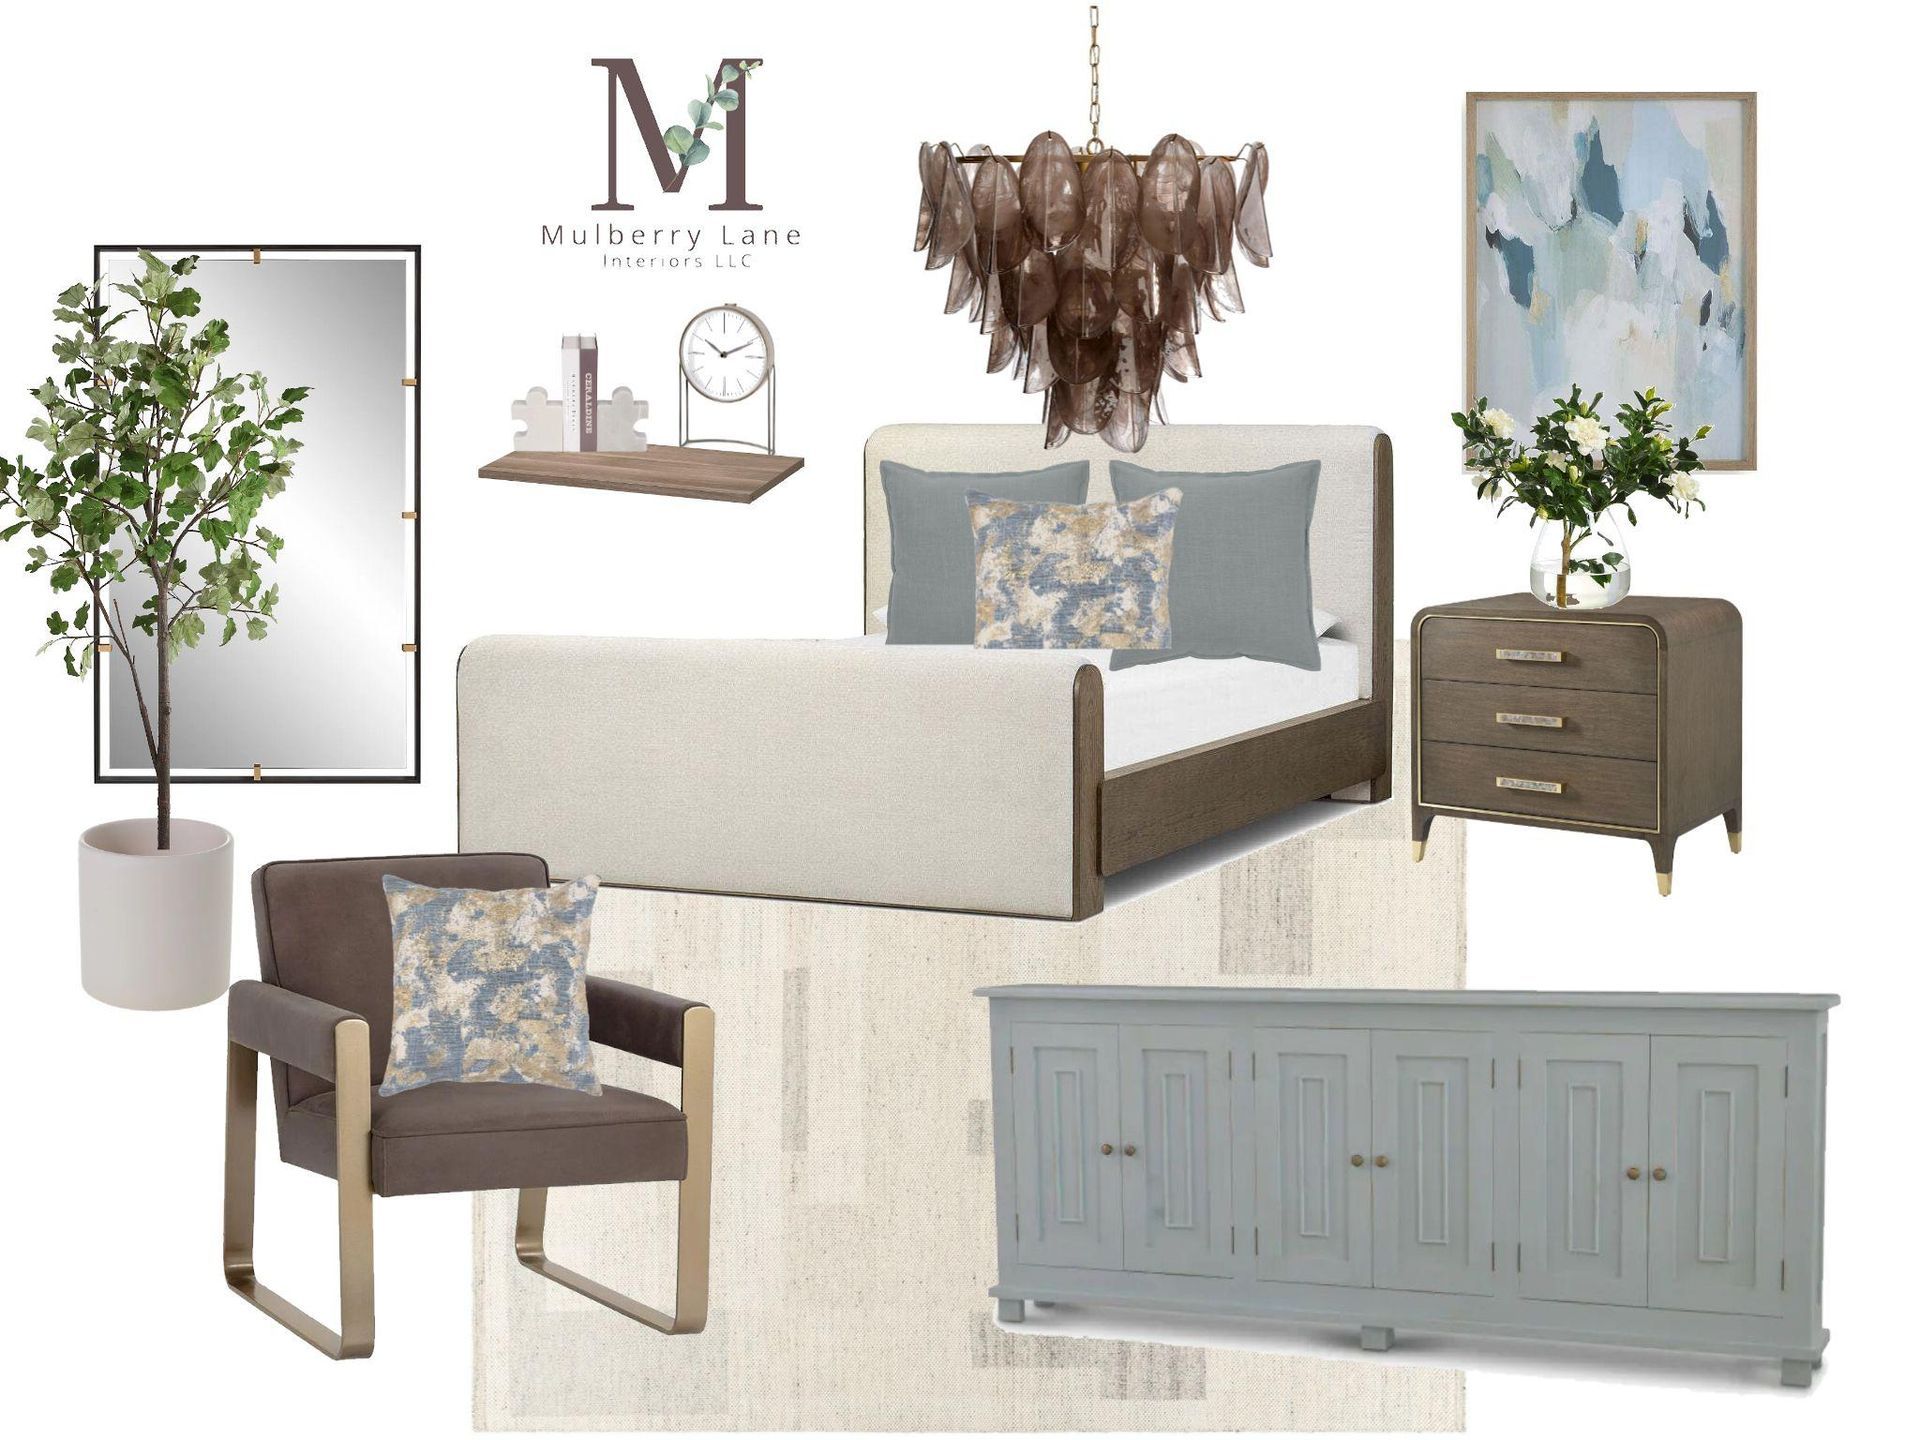
A concept board is a visual representation of your future space. It brings together:
- Furniture
- Decor
- Color palettes
- Textures and finishes
All in one cohesive visual plan.
Think of it as your project’s roadmap—making sure every choice works together before you spend a dime on products.
Without a concept board, it’s easy to end up with mismatched pieces, clashing styles, or a room that feels “off.” With it, every decision has a purpose.
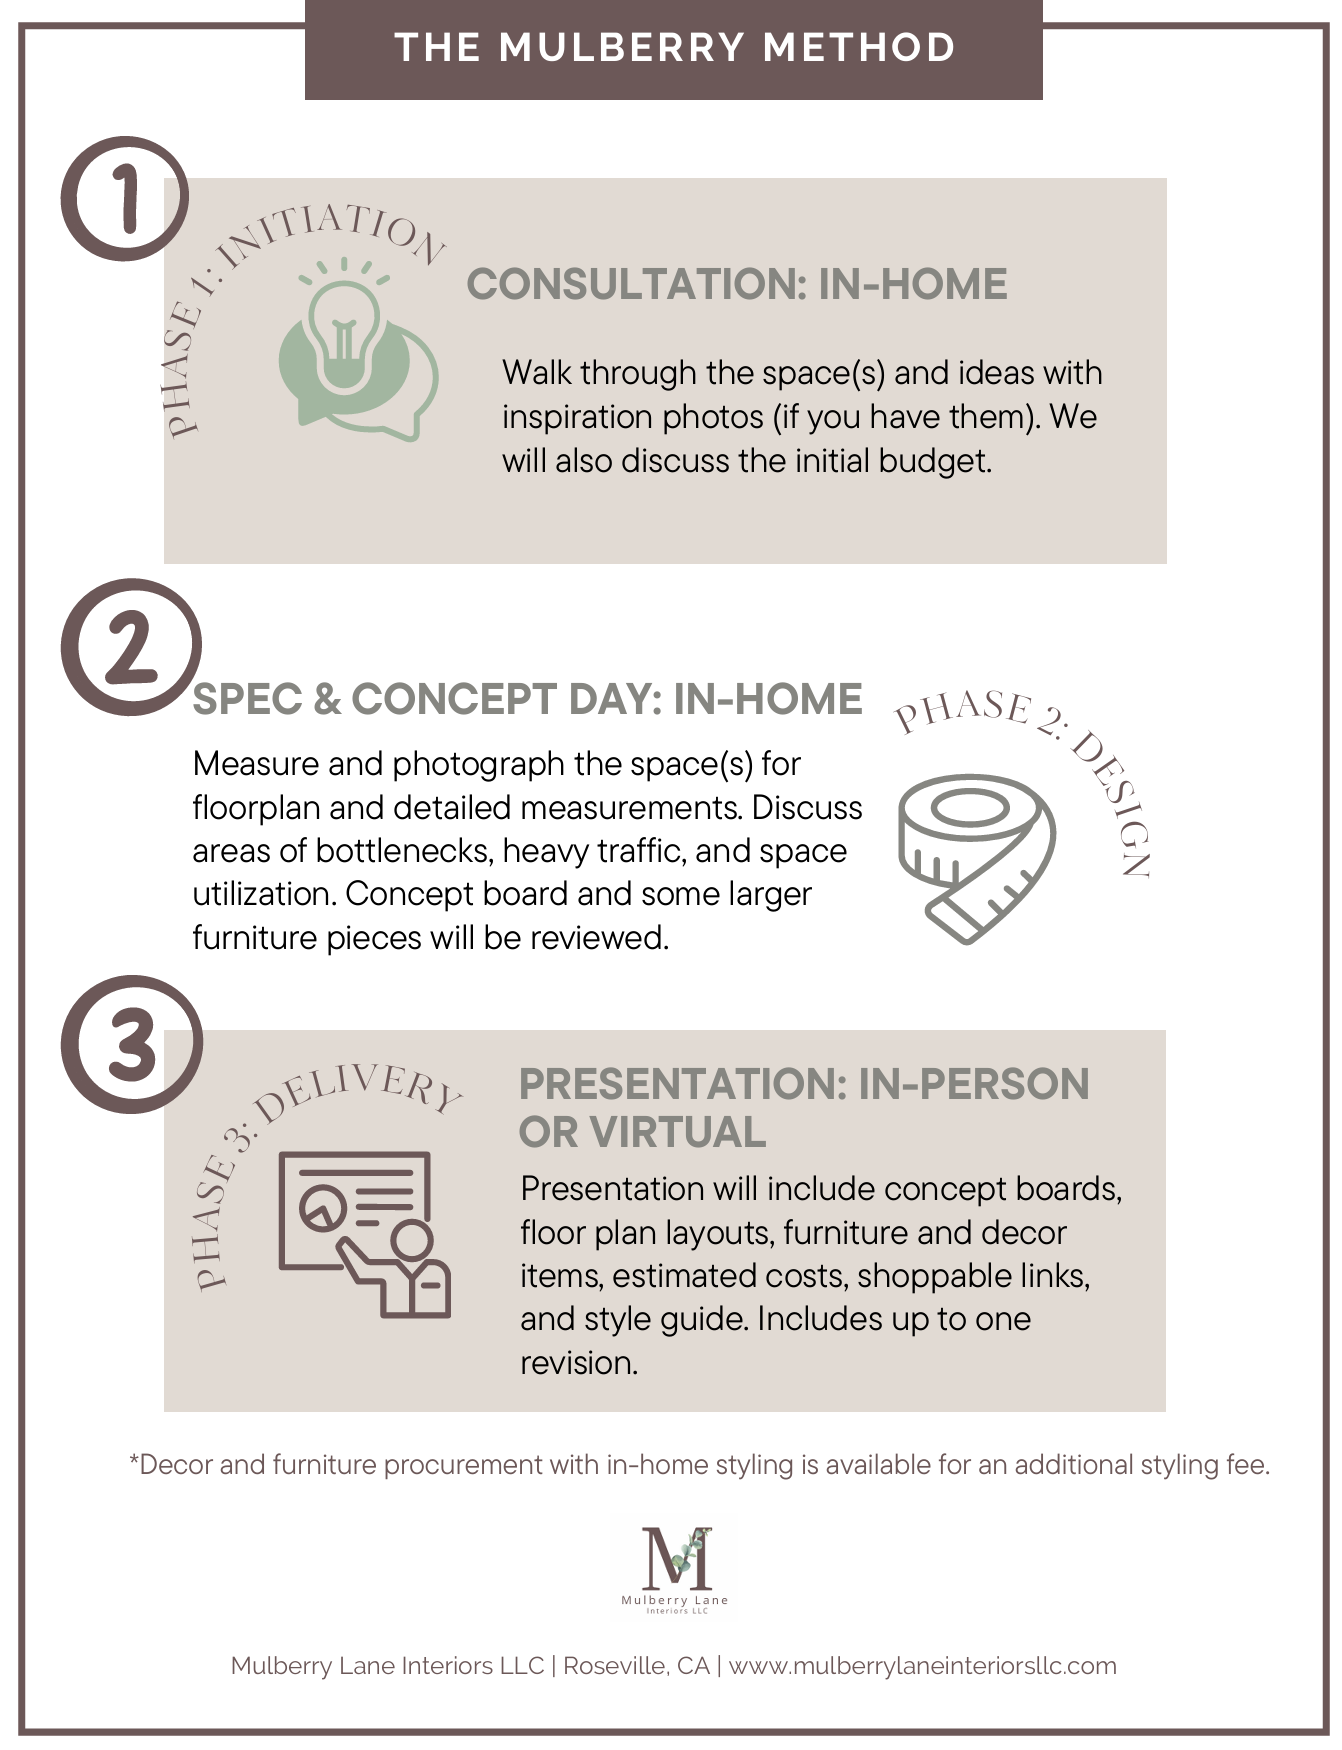
Step 1: The Consultation — Defining Your Vision
Your dream room starts with a conversation.
During your in-home consultation, we:
- Walk through your space and talk about how you use it.
- Review inspiration images—whether that’s a Pinterest board, Instagram saves, magazine clippings, or snapshots from your travels.
- Discuss budget so we can align style and scope from the start.
- Identify your must-haves (a certain sofa, a reading nook) and nice-to-haves.
Pro Tip: The more you share—about your lifestyle, tastes, and goals—the better we can design a space that truly works for you.
Step 2: Spec Day — The Foundation of Your Design
Once we’ve learned your vision, it’s time to get technical.
On Spec Day, our team will:
- Measure & Photograph your room from every angle.
- Take note of traffic flow, bottlenecks, and focal points.
- Record shelf dimensions, wall lengths, window sizes, and floor space.
- Discuss which existing pieces you’d like to keep or replace.
We also bring early inspiration images so you can react in real time—helping us refine the direction before we start designing.
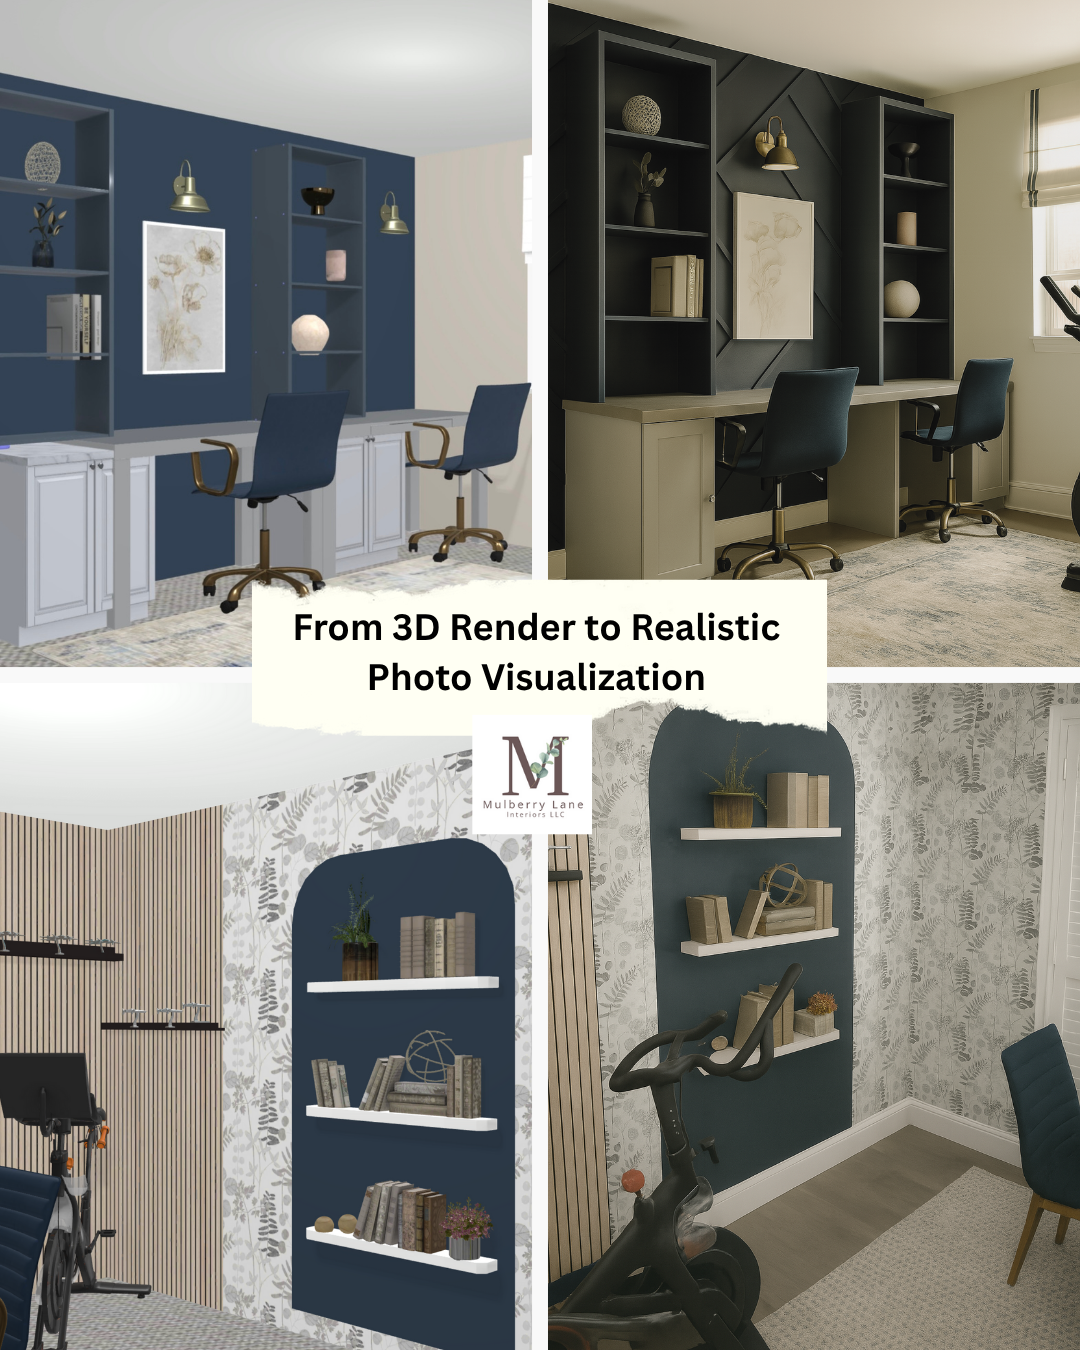
Step 3: Initial Concept Development
With measurements and inspiration in hand, we start pulling together your room’s design DNA.
This stage includes:
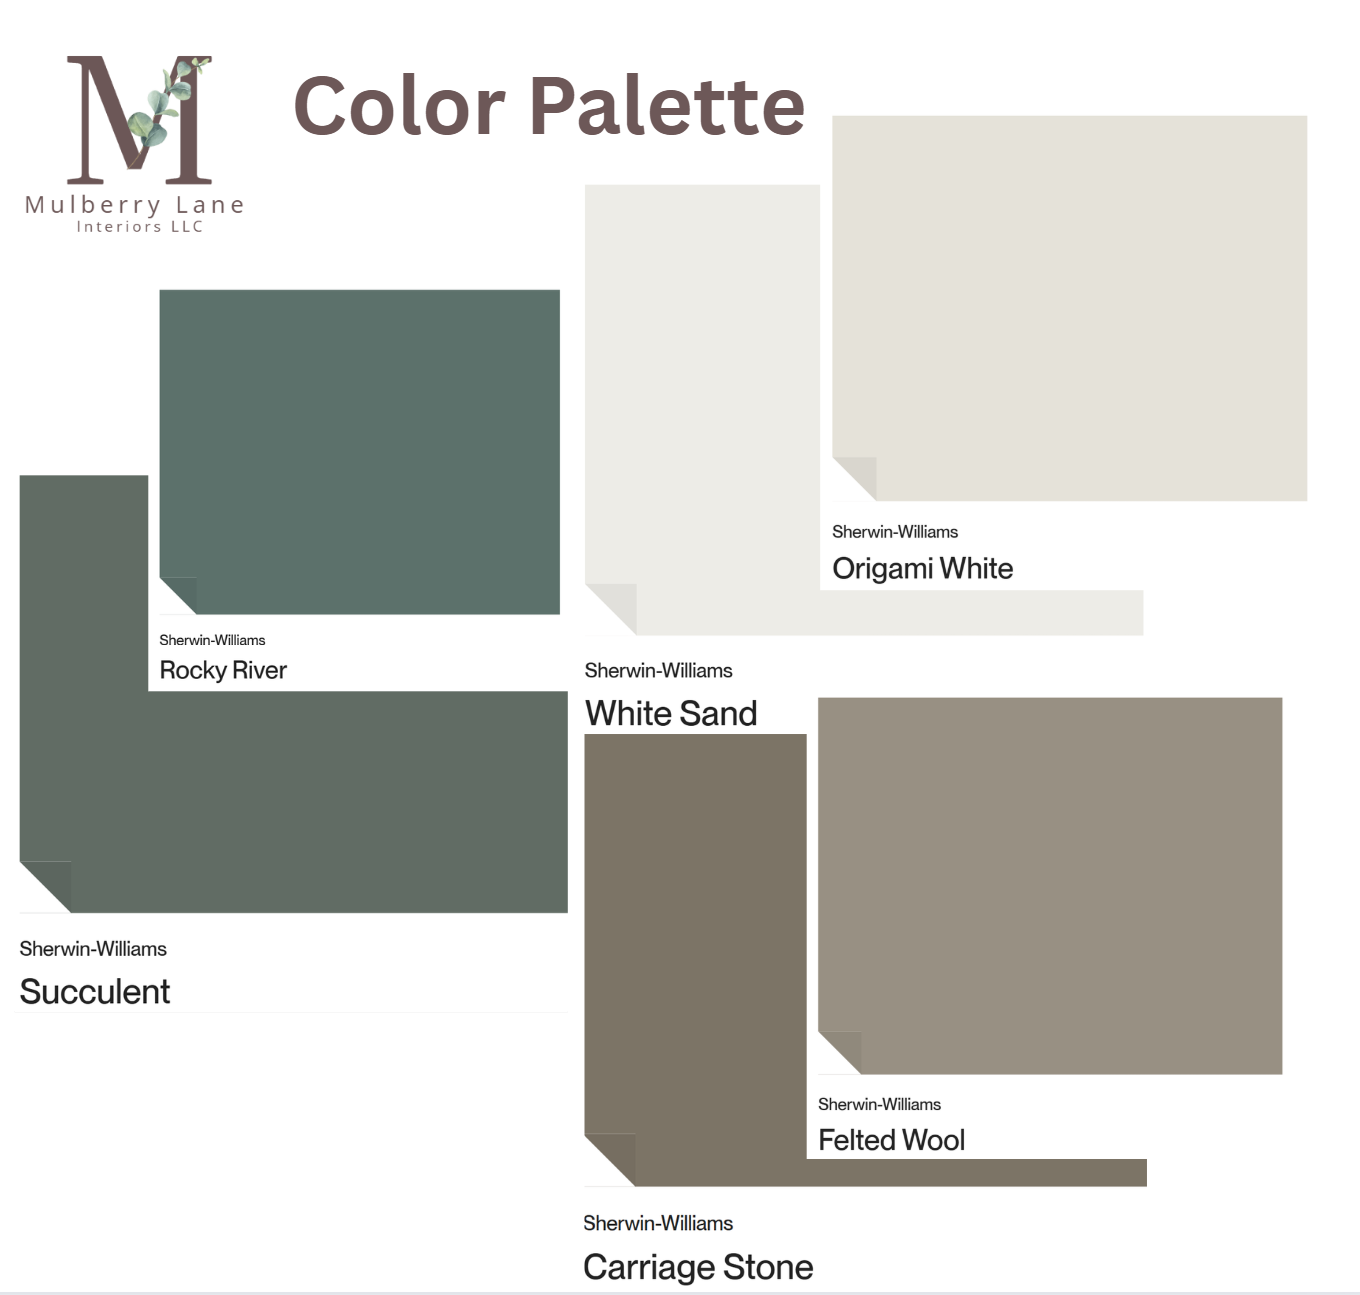
- Color palette selection: A harmonious mix of base, accent, and texture tones.
- Furniture suggestions: Pieces that fit the scale and style of your room.
- Decor accents: Rugs, lighting, artwork, textiles, and plants.
- Layout planning: Ensuring every item has a purpose and place.
The goal here is to make sure everything coordinates—no surprises later.
Step 4: Concept & Budget Review
We schedule a meeting—either in person or virtually—to review your initial concept board and estimated costs.
You’ll see:
- A visual mockup of your future space.
- A floor plan showing item placement.
- Shoppable links for all suggested pieces.
- A style guide explaining how each element ties together.
We also talk through:
- Alternatives if something doesn’t feel quite right.
- Potential upgrades or substitutions.
- Timeline expectations.
This is a collaborative step—your feedback is essential.
Step 5: Refinements & Revisions
You get
one round of revisions included in our process to fine-tune the details.
We might adjust:
- Color tones
- Furniture sizes
- Fabric options
- Decor choices
Design revisions typically take 2–3 weeks, depending on the scope. The final goal: a concept board you’re 100% excited about.
Step 6: Final Design Approval
Once revisions are complete, you receive your final design package, which includes:
- Concept board
- Floor plan layout
- Final product list
- Style guide
At this stage, we collect payment for any procurement and implementation services you’ve chosen, and we get ready to bring your room to life.
Step 7: Product Procurement
If you’ve hired us for full-service implementation, we handle all the shopping, ordering, and logistics for you:
- Ordering furniture and decor
- Tracking deliveries
- Storing items until everything is ready
We’ll also source finishing accessories—like vases, throws, and artwork—often from local Roseville and Sacramento shops to give your room unique personality.
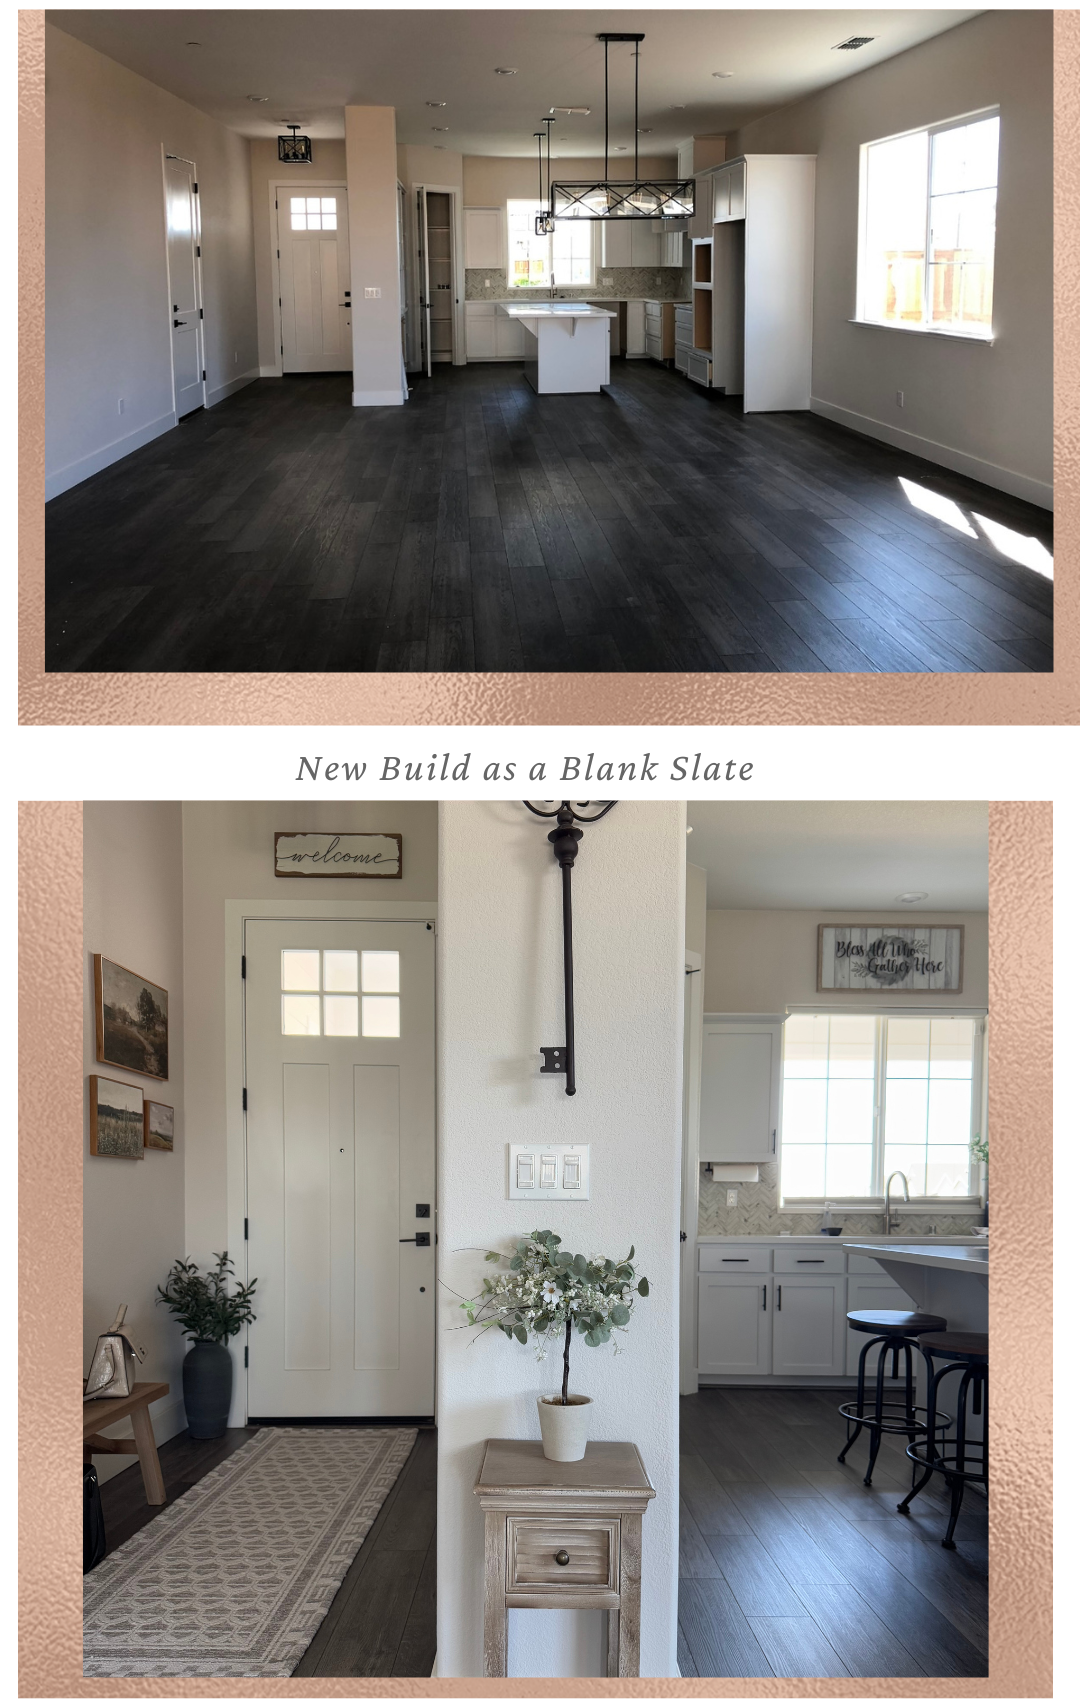
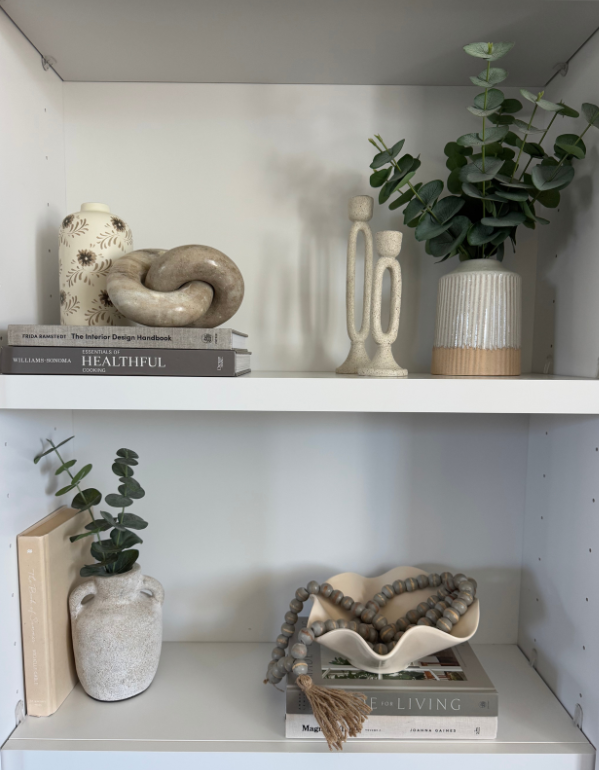
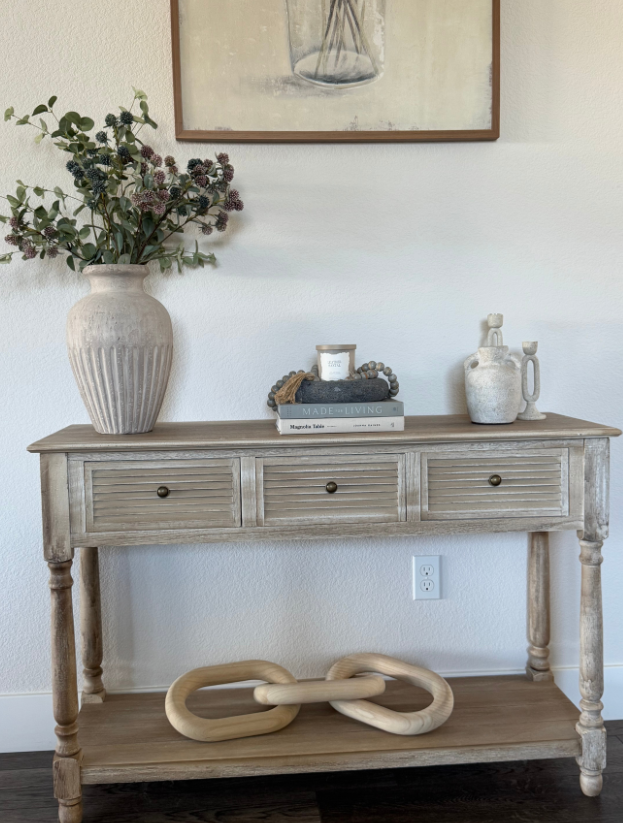
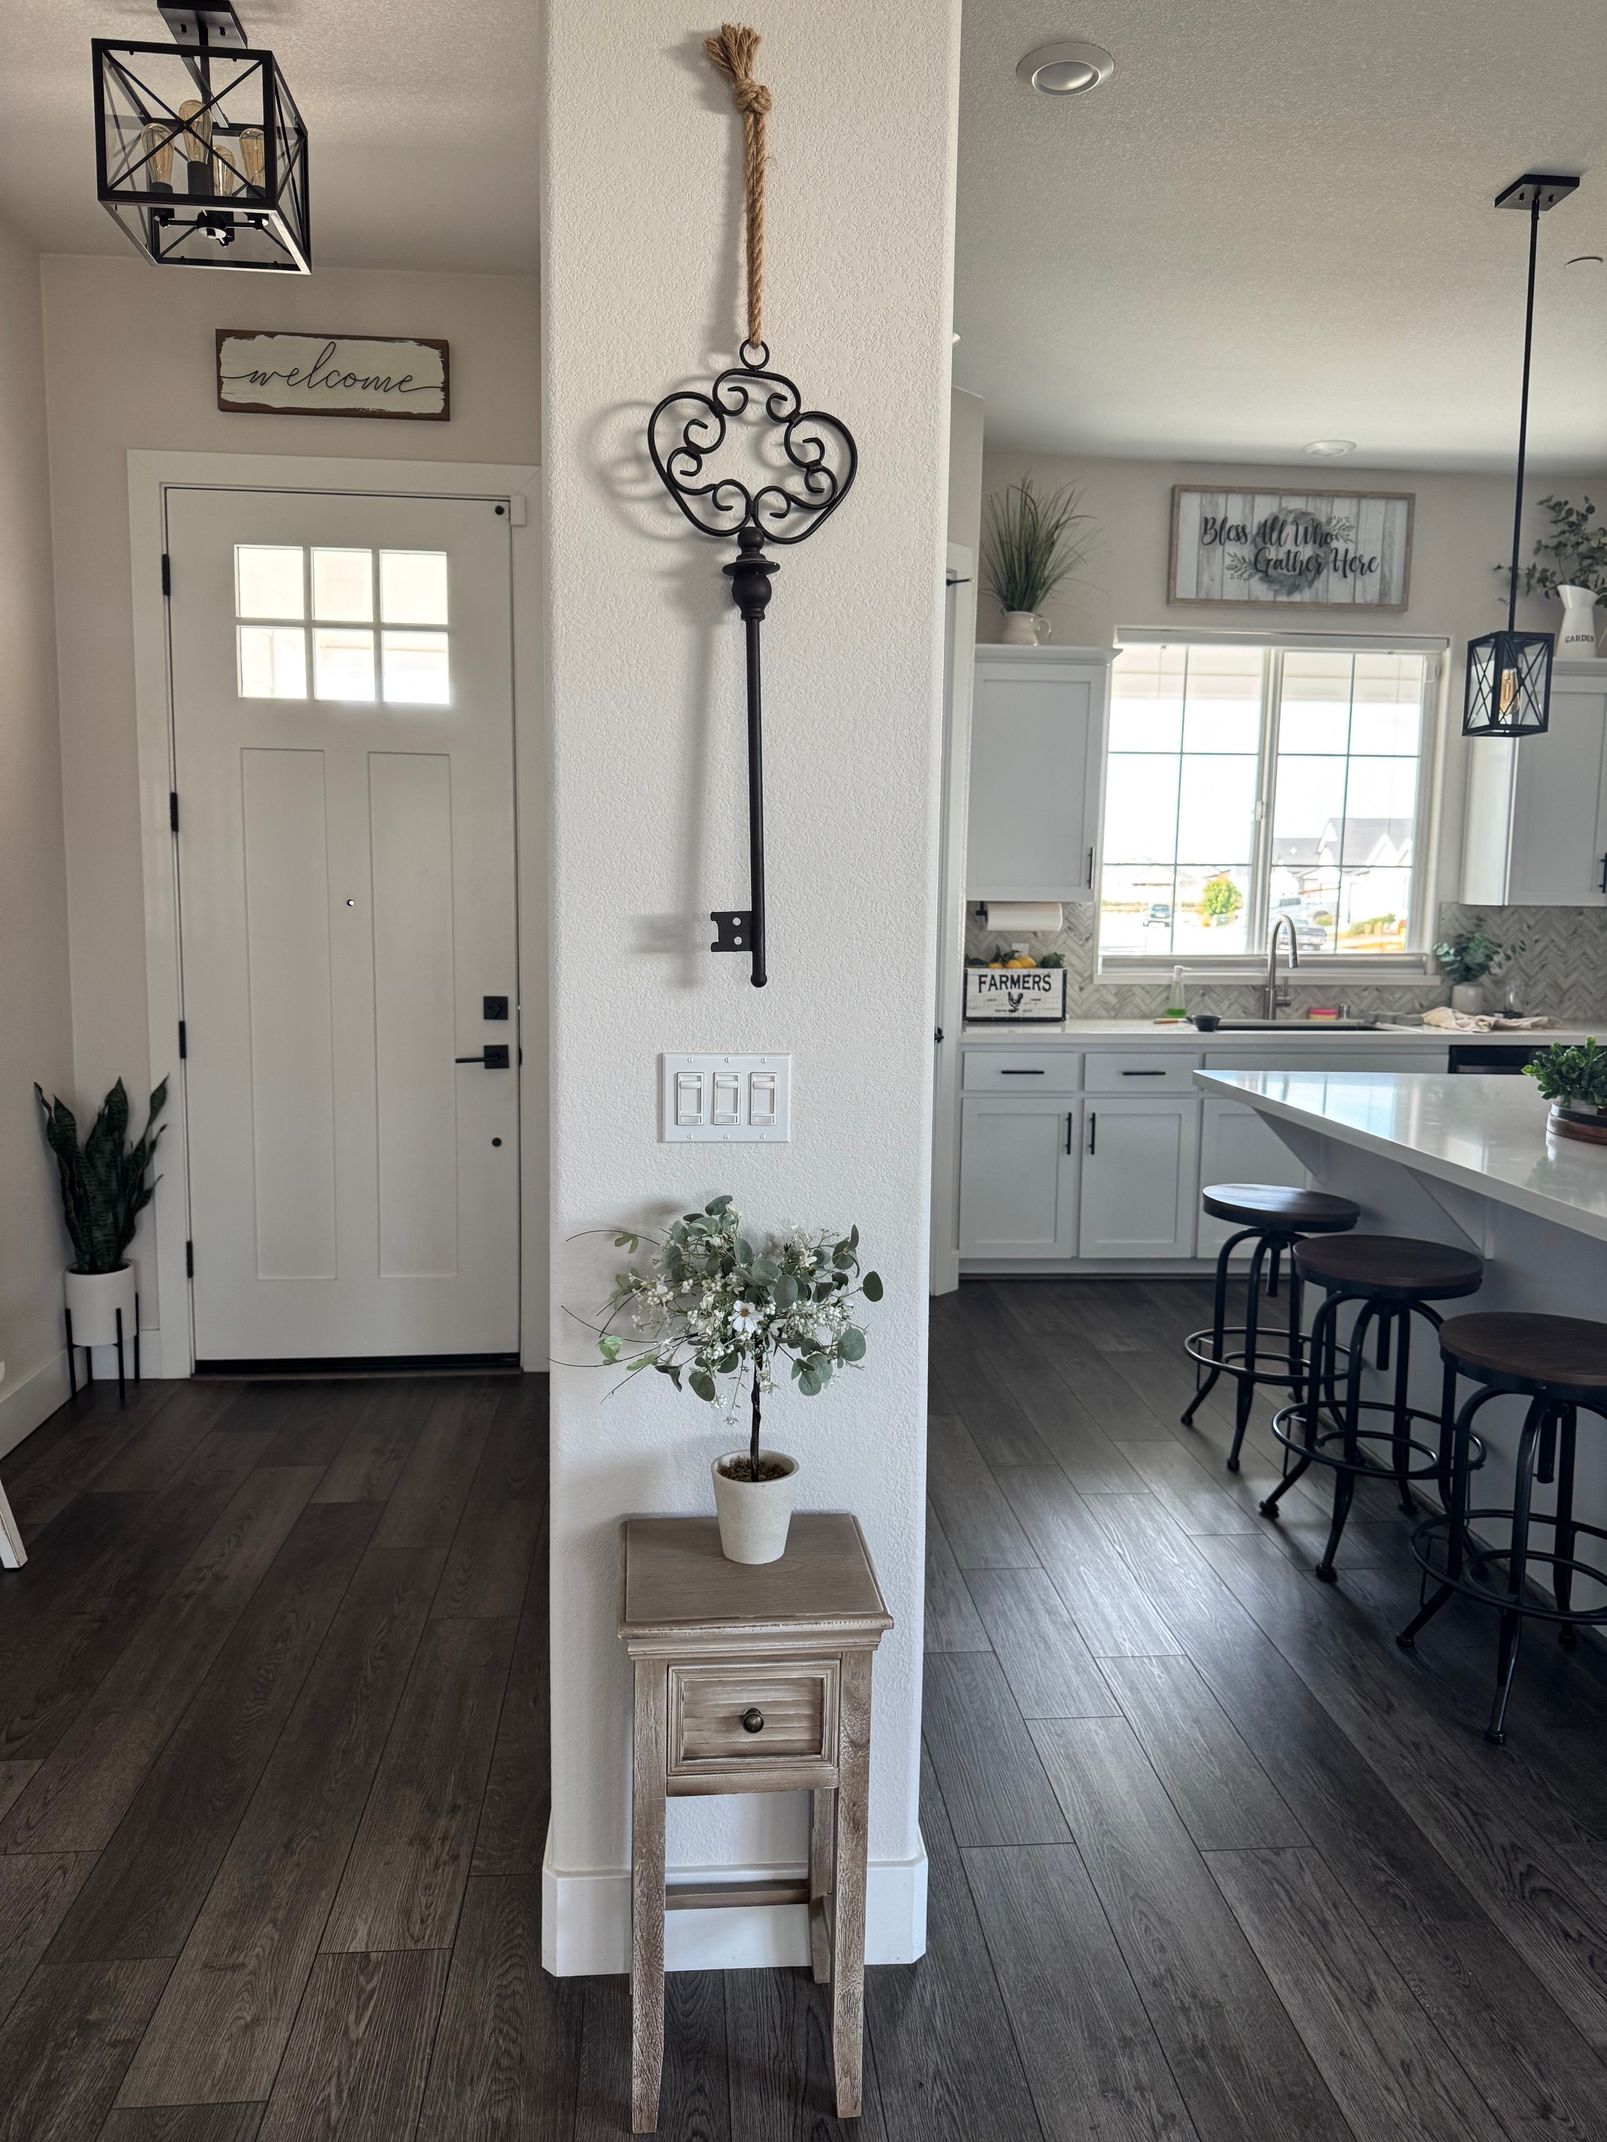
Step 8: Styling Day
This is the day your concept board leaps off the page and into your home.
We:
- Arrange furniture for flow and function.
- Layer in rugs, pillows, and accessories.
- Hang artwork and mirrors at the perfect height.
- Style shelves and surfaces so they look polished yet livable.
This step transforms the space from furnished to finished.
Step 9: The Big Reveal
We invite you into your newly styled room for the reveal moment. It’s the highlight of the process—when you get to see your vision fully realized.
We walk you through:
- Why each piece was chosen.
- How to maintain your new look.
- Ideas for evolving the room over time.
Why Our Concept Board Process Works
Our Step-by-Step approach ensures:
- No guesswork—you can envision your space.
- A cohesive design—every piece works together.
- A smooth installation—because we planned every detail in advance.
It’s not just about a pretty room. It’s about creating a space that feels right for your life.
Your Dream Room Is Just a Concept Board Away
If you’re ready to turn your scattered ideas into a space you can’t wait to come home to, Mulberry Lane Interiors LLC is here to help.
We serve clients throughout Roseville, CA, and also offer virtual concept board services for those outside our area.
Book your consultation today and let’s start building your dream room—step by step.
For more inspiration:
- Learn how we Balance Style and Function for everyday living.
- See our tips for Maximizing Small Spaces in style.